Using ngrok to Simplify Developing for Alexa
I've recently been toying with building an Alexa skill. Not sure what exactly, something to goof around with the kids with. I was listening to a recent episode of Talk Python To Me and heard of a tool called ngrok which will make my development much easier.
Essentially ngrok creates a tunnel to your computer that is accessible on the internet. You launch ngrok and you get a URL you can access from anywhere. No need to setup port forwarding or anything in your router. This makes working with Alexa much easier, especially in the early stages when I'm trying things to see what works and what doesn't. It means I don't have to push to a public web server to see my changes.
All you need is a free ngrok account. I'll assume you can figure out how to setup an Alexa skill by following Amazon's instructions.
Ngrok Setup
Start by downloading and unzipping ngrok. Then connect your account by running the authtoken command. You can find the exact command you need by signing into your ngrok account and looking at your dashboard.
For Windows ngrok will just be an executable. So you need to either call it from the folder it is placed in or add it to your System Path. Also, for windows you don't need to preface each command with './'. Instead just call ngrok directly.
ngrok authtoken <your_auth_token_goes_here>
Next you just need to launch ngrok to create a new tunnel. I'm working with Flask-Ask and my dev server is running on my localhost on port 5000. So I use this command:
ngrok http 5000
A second or two later my tunnel is up and running and I can see the URL listed in the Forwarding area.
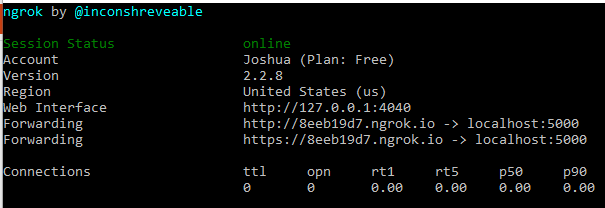
With my free account I get a new random URL each time I launch ngrok. This isn't a problem for what I'm doing here, but I can definitely see how useful it would be to have a paid account if you were doing client demos.
Alexa Setup
In your Alexa dashboard you need to make a couple of settings adjustments.
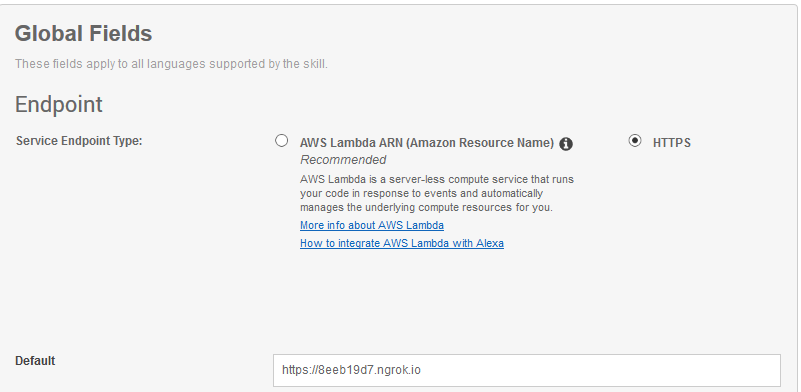
First, under the 'Configuration' tab set the the Endpoint to HTTPS and set the Default to the HTTPS url that NGROK just gave you. Since this URL changes each time you launch ngrok you'll need to update this field in your skill. Fortunately, this doesn't require any rebuild of the skill and the change is effective immediately.
Next, under the 'SSL Certificate' tab be sure to pick the option for 'My development endpoint is a sub-domain of a domain that has a wildcard certificate from a certificate authority'. This lets you use the SSL certificate that ngrok provides for the random subdomain they gave you.
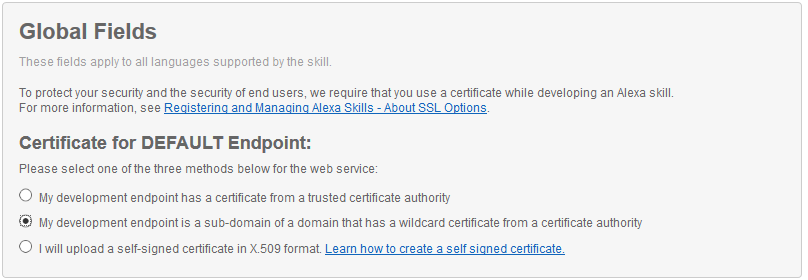
If you don't set this option Amazon will refuse to even send traffic to your server. You'll get an error when you test it from the Skill's testing page.
The remote endpoint could not be called, or the response it returned was invalid.
Remember to update your URL in the 'Configuration' tab each time you relaunch ngrok and be sure to checkout the ngrok documentation. Their 'inspector' tool is really helpful to see the values of each request and response, especially when things go wrong.
Comments
Comments powered by Disqus