Using Cookiecutter to Jumpstart a Django Project on Windows with PyCharm
I'm a big fan of automation. So I've been interested in the Cookiecutter project since I saw it at PyCon in 2016. When I decided to get more familiar with Django, I thought it would be a good chance to give it a spin.
This post will go over installing and using Cookiecutter, installing and setting up Postgresql as our database, configuring PyCharm to work with our project, and finally getting the whole thing running on the built-in development server. From there you can build your project from a solid foundation.
This article ended up longer than I expected. So long in fact it needs a table of contents.
Contents
Important
If you don't already have Python 3 installed, go to python.org and get it. I'll wait. Ready? Great.
Cookiecutter
Cookiecutter is a tool that lets you define templates that can be used to create projects. It lets you capture input during the project creation and use that to customize the project files. It sounds simple, but it is really helpful, especially when combined with templates put together by experts in various tooling and frameworks. We'll get to that shortly. First, let's install Cookiecutter.
Cookiecutter is a Python project, so I'm going to assume you have Python 3 installed already. If not, do that. As a python package we can install it easily using pip. Normally I'd suggest installing packages into a virtualenv, but this is one of those tools you'll want available system-wide. From your command prompt run this to install the most recent version of Cookiecutter:
> pip install cookiecutter
Now that we have Cookiecutter installed we can move on to using our first cookiecutter.
PyCharm
I like PyCharm. I'm a big user of vim too, but I really like the help PyCharm gives me as an IDE. When we ran Cookicutter to create our project we said yes to use_pycharm. That told Cookiecutter to create some files for us that PyCharm expects to see. It is a good start, but we have some more work to do to get everything ready to go.
Open the Project
The first step is to open up our project in PyCharm. That is just as simple as selecting File - Open from the menu and picking our top-level project directory. PyCharm will start indexing the files and examining the structure.
Note
For now you can dismiss the version control warning. We'll come back to that later.

Setup the VirtualEnv
Right now we have a Python project with no Python interpreter setup to run it. We'll have PyCharm create a virtualenv to keep this project's requirements separate from any other project you may start.
From the menu select File - Settings.
Next, expand the Project: tab and click Project Interpreter.
Click the gear icon
 in the top-right corner and select Create VirtualEnv.
-
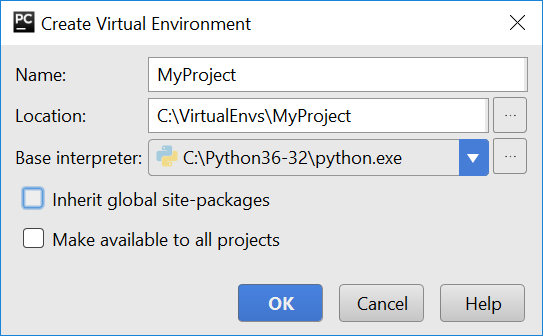
In the popup give your virtualenv a name, pick a location (I like a single VirtualEnvs directory in my C:drive), select the python interpreter you want to use, leave the boxes unchecked, and click OK.

Now we have a mostly empty Python environment. The built-in packages are available, but we don't have the libraries we are going to need for our project (like Django!).
Install Packages
There are two ways to install the packages we need. We can use the UI in PyCharm to select them one-by-one or we can use pip from the command line to install everything at once. We can do that because cookiecutter-django helpfully created a set of requirements files for us.
But before we get that far, lets take a look at the requirements. In your project you'll see a requirements directory and in that a list of files. The packages in base.txt get installed in all instances. These are included automatically in the local.txt, production.txt, and test.txt files. These each represent the packages needed in the given environment. You may need different packages in production than you do in development (local.txt) for example.
My version of cookiecutter-django wants to install Django 1.10. But I want to use Django 1.11 because it is available and is considered a long term support release. To get that version we'll open base.txt and edit the line like this and then save the file:
django==1.11.1
And we'll need the Python Postgres database adapter, too. Open up local.txt, add this line somewhere, and save it:
# Python Postgres database adapter
psycopg2==2.7.1
Open up the command terminal from inside PyCharm by clicking the Terminal  button at the bottom of the screen. If you don't see it, click the little icon in the lower-left
 ![]() (I don't know what to call it) and select Terminal from the menu.
(I don't know what to call it) and select Terminal from the menu.
The important thing to notice is that not only is this the Windows command prompt, but that PyCharm has automatically launched our virtualenv for us. You can tell because the prompt is preceded by parens with the name of the virtualenv inside. That means that when we run pip commands they will take place inside the virtualenv and our packages will end up in the right place.
Let's install those packages:
(MyProject) C:\..\MyProject> pip install -r requirements\local.txt
All that output means that pip is downloading and installing the libraries we need. This is the beauty of open source and Python. Think of all the capabilities we just installed without having to write it and test it ourselves. And you can also see why we don't want to install them all one-by-one through the UI.
PostgreSQL

PostgreSQL is an open source SQL database. It's Django's preferred database, and it's a good one, so lets use it. Yes, you could develop against something like SQLite, but it will save you headaches later if your development environment is as much like your deployment environment as possible. To that end we'll set up Postgres locally.
Download and Install
To begin, download the latest version of PostgreSQL for Windows. Once it has finished run through the installer. The defaults are fine. You will be asked to create a password for the postgres user. Make sure you remember this password. This is the master password for your database.
Now that we have our database server installed and running we need to create the database and users for our Django project. We can do this from the command line or through a tool like pgAdmin4.exe. Let's walk through both options.
Setup Database via Command Line
For this we'll use the terminal built into PyCharm again (but you could also use the normal command prompt). The first thing to note is that the PostgreSQL tools aren't in the system path so we can't call them just by name.
To create the user we'll move into the Postgres bin directory and then use createuser.exe.
>cd "c:\Program Files\PostgreSQL\9.6\bin"
>createuser.exe -P -U postgres YourProjectUserName
>Enter password for new role:
>Enter it again:
>Password:
This will create a new user called YourProjectUserName. The first time they ask for the password they want the password for the new user/role you are creating. The second time they want you to enter it again to make sure you really know it. The password they want at the 'Password:' prompt is looking for the password for the 'postgres' superuser. The one you created when you installed PostgreSQL.
Next we need to create a new database and make our new user the owner.
>cd "c:\Pogram Files\PostgreSQL\9.6\bin"
>createdb.exe createdb.exe -U postgres -O YourProjectUserName YourProjectDatabaseName
Again, the 'Password:' prompt is for the 'postgres' superuser. With that you will create a new database, here called 'YourProjectDatabaseName' with 'YourProjectUserName' as the owner.
Setup Database with pgAdmin
If the command line isn't your thing or you just can't seem to get it right, you can do all of this with the pgAdmin tool. Launch pgAdmin4.exe from c:Program FilespgAdmin 4bin. On my computer at least the tool feels a little slow, but it is useful to know how to work it.
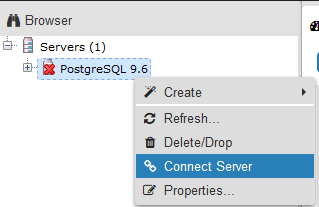
In the top-left expand 'Servers'. Then right-click on your PostgreSQL server listed and select 'Connect Server'.
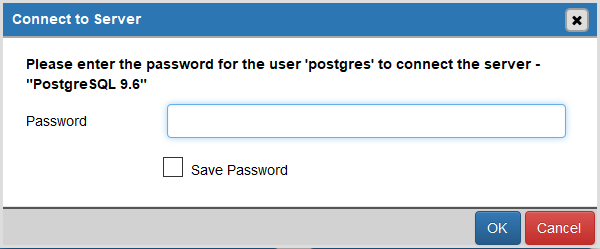
At the prompt enter the password for the 'postgres' superuser and click OK.
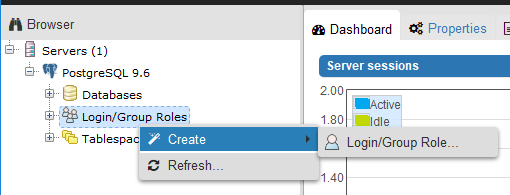
Expand your server and right-click on Login/Group Roles and click Create - Login/Group Role.
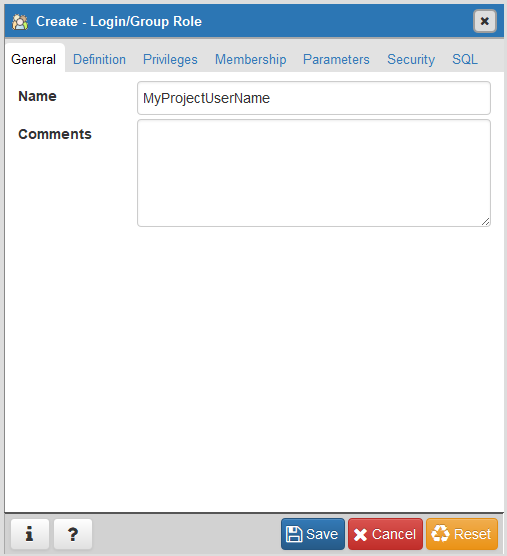
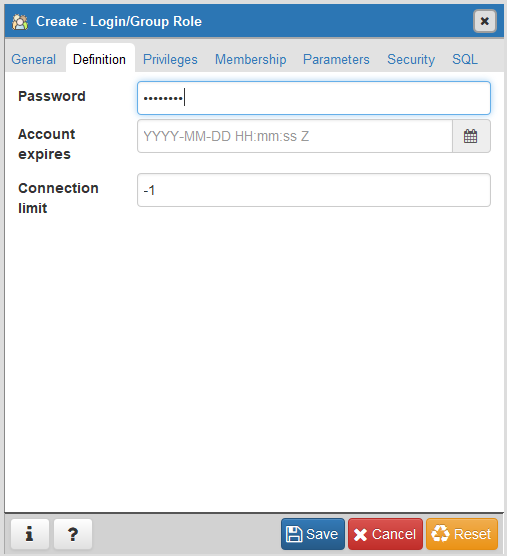
On the 'General' tab enter the user name. On the 'Definition' tab enter the password for the new user. On the 'Privileges' tab toggle 'Can login?' to Yes. The rest of the options on the remainder of the tabs are fine. Click Save to create your new user.

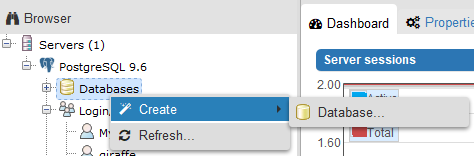
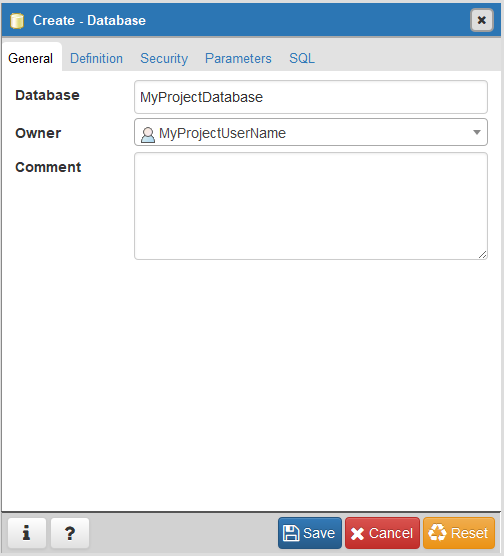
On to the database! Right-click on Databases, select Create - Database...
Enter your database's name and then select your user from the drop-down. Click Save and you're done.
Final PyCharm Settings
Now that we have our database setup there are a few things left over we need to take care of in PyCharm. Cookiecutter-django creates almost everything we need for PyCharm, but not quite everything.
In the PyCharm open up File - Settings. Expand Languages and Frameworks and then Django.
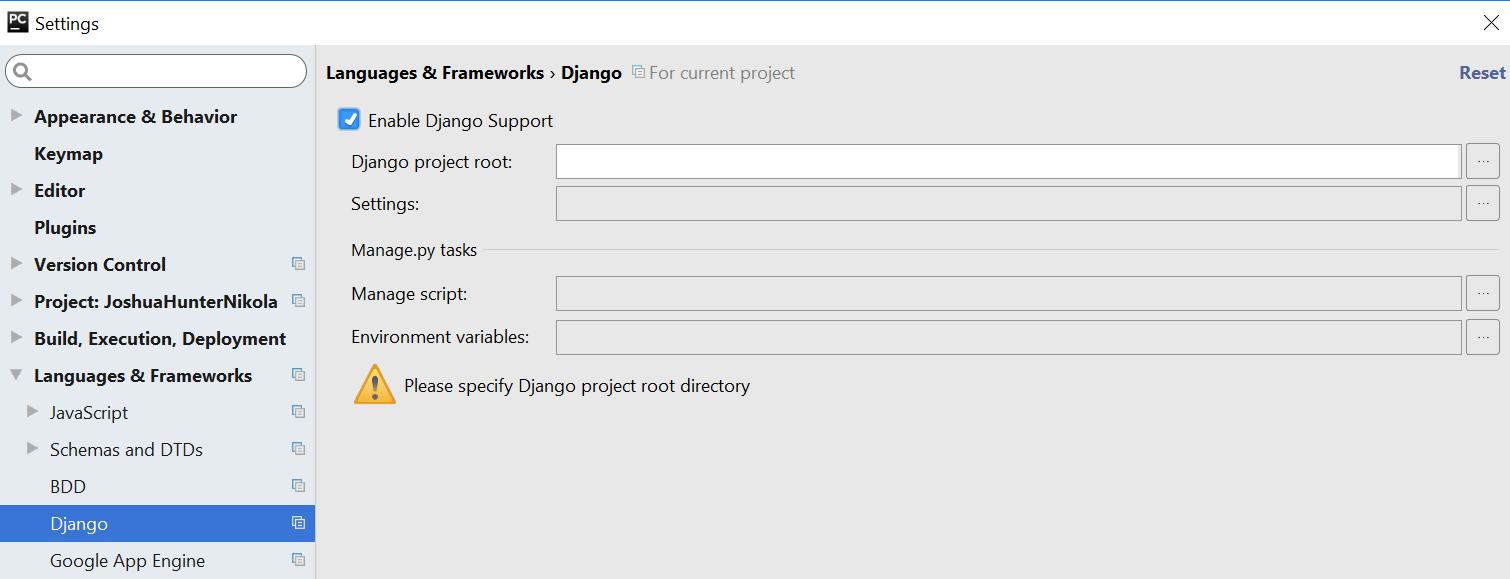
Check the box for 'Enable Django Support'. That tells PyCharm to do things like add a 'Run manage.py task' to the tools menu among other useful changes.
In the 'Django project root' find the path to the project folder created by cookiecutter-django.
In settings navigate to /config/settings/local.py inside your project folder. The local.py file is for our development environment, so that is the one we want.
It should find the path to your manage.py automatically.
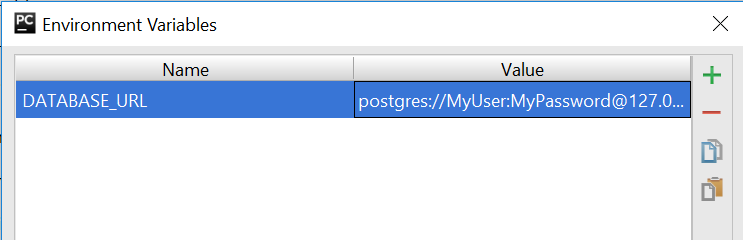
Cookiecutter-django follows best practices and prefers to store settings in environment variables rather than configuration files whenever possible. It makes deploying and testing easier and it helps prevent accidentally exposing secrets by committing a config file to an open source repository. PyCharm will set environmental variables for us when we run the Django server. To give it values click the [...] button to the far right of 'Environment variables'.
The only variable we need to set right now is DATABASE_URL. The value will be a url string that includes all the details we need to connect to our database: * username * password * host * port * database name
That's a lot. It will look like this:
# format
postgres://username:password@host:port/database

# filled with example data
postgres://MyUser:MyPassword@127.0.0.1:5432/MyDatabase
Click the green plus and then fill in the name and value and click OK.
Run the Server
Finally! We are ready to test everything. From the menu select Tools - Run manage.py Task. It will open up a new console at the bottom of the PyCharm window. In that console run the 'migrate' command. That will configure our database schema for us. If you got errors, check that your DATABASE_URL string is absolutely correct. With luck the error message will point you in the right direction.
Once that is complete run the 'runserver' command. That will start up the Django development server and we can finally see Django running in our browser. Just click the link in the output.

Optional
Now that everything works there are a few optional things to take care of.
Removing Docker Run Configurations
Even though I answered No to Docker, a handful of Docker run configurations got created. I don't need them, so best to get rid of them and keep things tidy. To do that go to Run - Edit Configuration. Under Django Server highlight the configurations and click the red minus button to delete them.

Setting up Version Control
We're finally ready to fix that version control error we dismissed earlier. If you want version control (and you probably do) the easiest thing to do is select VCS - Import into Version Control and pick either Create Git Repository or Create Mercurial Repository depending on your VCS of choice. Follow the prompts. They are slightly different, but pretty self explanatory.
Comments
Comments powered by Disqus