Restoring the Sambar's Headlights
Of the many things that need fixing on my Subaru Sambar, restoring the headlights is probably down at the bottom of the list. They weren't terrible, they weren't really a safety issue, and they were working just fine. That is of course where I started.

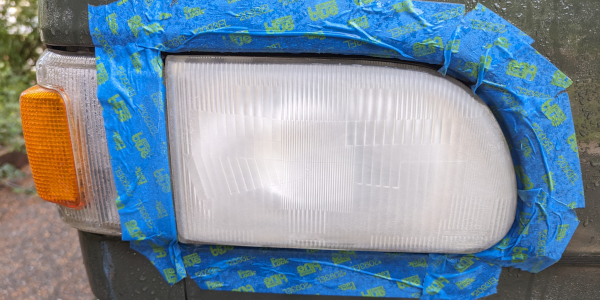
Before (left) and after polishing.
I have restored headlights using polishing kits before and they worked pretty well, but generally the lights turn yellow again pretty quickly. This time I chose the Sylvania Headlight Restoration based on the recommendation from Project Farm. This kit comes with a UV blocker you apply at the end that is supposed to extend the life of the restoration. Fingers crossed.
The whole process was similar to previous kits and took maybe 2 hours to complete (not counting the 6 hour cure time after applying the UV blocker). The only prep I did was to wash the lights and then protect the paint around the lights with some painters tape. I've had the kit for some time, but finding a window where you can absolutely guarantee no rain or fog for at least 6 hours meant waiting until the end of June.
Following the instructions, which were easy and clear, you wet sand the headlights by hand with progressively finer sandpaper and finally a rubbing compound. Even though I've done it before, it always makes me nervous as you make them far worse before they get better.
In progress
Comments
Comments powered by Disqus